



Auction-building functionality can be a good starting point for you. In this digital era, your consumers can conveniently participate in the auction with the help of auction bidding functionality. The most critical part of the online auction process is creating an environment of eagerness and hope for buyers to submit bids for their preferred items.
Step -by -Step Guide for How To Add Auction Bidding Functionality to Your Website
Some steps must be followed while adding the auction-building functionality to your website. This guide will provide you with a path to follow for integrating the auction bidding functionality into your website.
Step – 1 Choose an Auction Solution
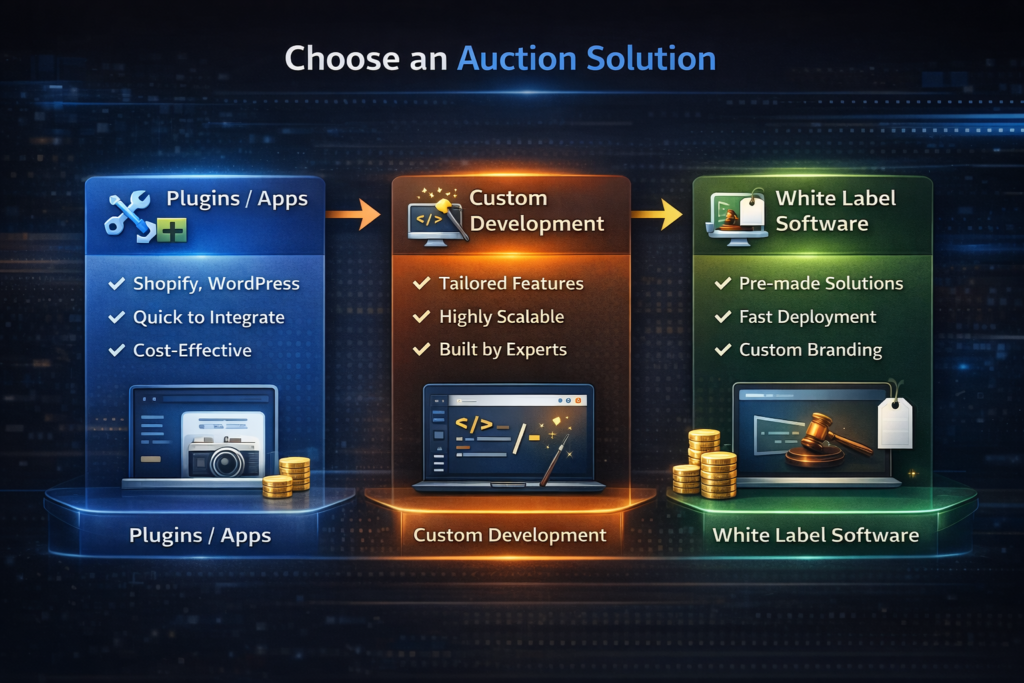
You have to choose the Auction solution carefully. Many auction bidding solutions exist in the market, such as Plugins or Apps, Third-party auction software providers, Custom development, etc. Let us look at some of the auction solutions in detail.
Plugins/Apps
Plugins/Apps are solutions that help to add different auction functionality to your website. The domain host can enhance the website’s capabilities without changing its core code.
For Shopify
- Tipo Auction Product: This helps you create auction bidding functionality on your website. Including this, you can make a user-friendly website with instant updates on the auction. It also increases the bidding time if someone bids at the last minute.
- Auction Plus: Auction Plus is another Shopify plugin that allows you to increase your user engagement with hassle-free bidding or auto-bidding functionality on your website. This plugin also provides an automated notification to the bid winner and gives them the notification to check out from the auction.
- Auction Pro: This app will help you transform your eCommerce platform or website by providing an unparalleled user experience in auction bidding. This app also promises the consumer support for the auction bidding.
- Webkul Product Auction: The Product Auction app simplifies creating and managing online auctions. It offers easy-to-use tools for setting up auctions, tracking bids, and monitoring activity. You can quickly launch auctions with customizable bidding increments and even import multiple auctions simultaneously. A joining fee can be implemented to verify bidder authenticity. The app also allows for various winners per auction and the option to restart unsuccessful auctions.
- Auction Today: Auctions offer a competitive platform for selling products or services. You can sell products and their variations in multiple currencies. Add minimum prices, instant-buy options, and rapid-fire bidding. Bidders can set a maximum bid for easy participation.
Various types of auction formats are supported with this add-on, such as penny auctions, and can be adjusted according to your branding. Summaries of auctions will appear on the product pages for easy viewing.
For WordPress
- Ultimate WordPress Auction Plugin: With the help of this plugin, you can easily integrate the auction bidding functionality into your website. This plugin also provides you with a highly configurable and effortless setup.
- WP Auction Plugins: This WordPress auction plugin will overflow any page or post on your site with live auction feeds using a widget. The auction display is excellent on all screen sizes, while the user experience remains unchanged. More importantly, it extends the time to prevent last-second bidding, flexible auction categorization, and configuration of shipping options. To ensure maximum sales, the WP Auction plugin comes with a second-chance option, allowing unsuccessful bidders to pay a purchase price for an item at their final bid price.
- Auction Nudge: This free WordPress Plugin can quickly give you the power to promote your eBay listing on the page and post, saving time and increasing awareness about the auction bidding. However, Auction Nudge does not provide the function of hosting an auction exclusively on the WordPress website. If you don’t have an eBay account, try using other listed plugins for more fruitful results.
- WooCommerce Simple Plugins: WooCommerce Simple Auctions is a plugin that makes adding auction functionality to any existing WooCommerce store easy. It allows physical and digital products to be sold via an auction. Key features include timed bidding, relisting options, and secure processing of payments.
- WP-Lister: WP-Lister for Amazon enables you to easily list your WooCommerce products on Amazon and manage orders from the two platforms in one place. Advanced templates can be used to configure your eBay listings, and even an option to sell your templates to others.
Pros and cons of plugins
Pros
- Free or inexpensive: In the Shopify or WordPress accounts, you will get free functionality on basic plans, whereas, in the premium plan, you will get more functionality for your auction website.
- You can save time
- Easy to Update
- Easy to activate
Cons
- Plugin Conflicts
- Need to install in your system instances
- Unpredicted security
- Explains basic integration scenarios
Custom Auction Functionality Development
A good web developer can perfectly personalize your auction bidding facility to suit your goals, products, and services. Custom auction development enables advanced features that start with a smooth user experience. You can develop advanced auction software and make your auction website outstanding using current technologies such as PHP, Laravel, and Python.
Pros and Cons of Custom Auction Functionality Development
Pros
- Flexible and scalable
- Enhanced ROI (Return on Investment)
- Better Security measures
Cons
- Time-consuming
- Higher-investment
White Label Auction Software
Most web development companies provide software for adding auction bidding functionality. You can choose a company based on your preferences and the website’s aim. Choose the one that best fits your needs for an auction solution.
These are some of the auction software providers that you can choose from for your auction solution.
- Auction Worx: AuctionWorx is the complete package for auction solutions, fundraising, charity events, and entertainment. It features custom online auction pages, easy ticket integration, and solid event management. Make the whole process of conducting auctions effortless using the friendly interface of AuctionWorx to guarantee the success of your event.
- Silent Auction Pro: Silent Auction Pro is an auction solution software that organizes silent auctions, where the possible attendees can bid from anywhere with their mobile devices or laptops. It offers automated checkouts, free digital catalogs, and free processing with PayPal or Stripe.
- Merkeleon: Merkeleon is a highly configurable, full-featured online auction platform containing a set of functionalities in live-streaming, different payment options, and easy checkout. It has been developed to provide an extremely smooth user experience. The company has budget-friendly plans so that as many non-profits as possible can avail of its services in support of fundraising.
Pros and Cons of White Label Auction Software Providers
Pros
- Cost Effective
- Time – saving
- Made under Expertise
- Scalability
- Personalised feature
Cons
- Dependency
- Data Security Concerns
- Feature Bloat
Step – 2 Installation and Integration
For Plugin
If you have Shopify Store, then follow these steps to install auction app
- Shopify Admin Access: Log in to your Shopify store.
- View the App Store: find your app for your auction functionality in Shopify
- Install the App: A pop-up will instruct you to download the app by following the onscreen instructions.
- After following the instructions, your app will be downloaded and installed on your shopify. Now, you have to activate it on your shopify website.
If you have a WordPress Website, follow these steps to install Auction Plugin
- Log in to the admin area of your website: The first step is to log in to your website’s dashboard.
- Go to Plugins: From the left-hand side, hit “Plugins.”
- Add New: Now, click on “Add New.”
- Upload plugin: You can upload the plugin file if you downloaded it from a third-party source.
- Now search and install: In the directory, search for the plugin and then click on the option “Install Now.”
- Activate: After installation, click Activate.
For Custom Auction Functionality Development
Discussion on requirements: Understanding business needs and putting attention on auction functionality.
Planning & Design: Develop wireframes and models for incorporation of auction functionalities.
Development: Implement within a website that has auction bidding, integrated payment, and user management features.
Test: Test the features for their auction and web application functioning by putting all of them through rigorous testing.
Deployment: Go live with the website, featuring fully operational auction functionalities.
Maintenance & Support: Deliver updates and support to ensure the stable operation of the auction.
For White Label Auction Software Provider
This is possible according to specific instructions from some developer or company responsible for creating particular software or a system. This guide is often a document or several documents explaining how a connection or integration of their product with another system or application can be realised.
Step – 3 Configuration of the Auction Bidding
For Plugins/Apps
For Shopify Store
- This includes typically configuring bid increments, minimum bid amounts, reserve prices, auction durations, and options for proxy bidding.
- Other plugins may be available for custom-made bidding rules or time extensions.
- These are critical settings to be carefully tailored so that you have a fair, engaging, buyers’ friendly auction experience that will yield the best opportunity for optimum sales.
For WordPress Website
- Go to the plugin’s Settings tab
- Enter into the payment settings and general settings
- Go to the Add Auction tab. To add your auction
- Go to Pages in your admin dashboard and add a new page.
- Create a new page, add this shortcode [wdm_auction_listing], and publish.
For Custom Auction Development
- Level up your auction website with the latest technology. Think PHP, Python, or Laravel, and consult with a web developer to customize auction bidding functionality to provide a seamless user experience.
- Clearly define your vision about auction bidding functionality. Explain the detailed requirements to the developer; ensure he understands what you want to achieve with auction functionality within your website.
- Then, start designing the auction bidding segment of your website.
For White Label Auction Software Provider
Configuration of white label auction bidding software settings involves integrating existing systems and customization based on the house’s business requirements.
- First, choose a provider that can fulfil your needs for bidding options, payment processing, and possibly reporting tools.
- Once selected, use their provided documentation to download and install the software; usually, configuration involves user accounts, auction parameters, and payment gateways.
- Customize the interface and workflows of the software to your branding and operational process.
- You may further be required to integrate the software with your website or any other system using APIs.
- Configure the security settings to secure the user data and transactions. Conduct thorough testing on all the features to see that they work as expected before going live.
- Keep updating the software regularly and get the newest features, security patches, and other stuff the vendor has in store.
Step – 4 Add Auction Items
For Auction Plugins/Apps
For Shopify Store Apps
- Proceed to Products on your Shopify website
- Select the Item you want to add auction to
- Then click More Actions, followed by View Auction from the drop-down menu.
- You will be directed to the Products screen of the Auction app.
- Enter the following fields for the Product Auction.
For WordPress Plugin
- First, install an auction plugin on WordPress, like WP Auctions, WooCommerce Auctions, or Auction Nudge, to have the base functionality of running auctions.
- After activation, go to the plugin settings and configure general auction settings with bidding and payment options.
- To add auction items, go to the plugin’s Auction Management section and click “Add New Auction” or something similar.
- Fill in details of the auction, for example, the title and description of the item to be auctioned, the starting price for bidding, a reserve price if needed, and when it will end.
- Add relevant images and configure other parameters if necessary.
- Save the auction item; it will go live on your site for others to see and bid. Before listing the auction, you must preview it to ensure all details are correctly displayed.
For Custom Auction Functionality Development
The steps involved in adding auction items using custom auction software development are:
- Designing and implementing a database schema containing details of the auction items, like the title, description, starting bid, reserve price, and images, among others; designing a user interface where auction administrators will input these details through a web form or an admin panel.
- This form should connect the user to your back-end logic, handling data validation, saving, and updating auction items in the database.
- Add features for item categorization and tagging if you need them.
- Take advantage of a feature for file upload of images, storing them securely.
- Now, upon filling in the details of an item and submitting it, it will be on the auction platform with appropriate bidding options.
- Test the functionality such that a user sees the auction items correctly added, shown, and managed, and users can interact with them at their own will.
For White Label Auction Software Provider
- Log in to the third-party auction software provider’s website to add an auction item. Under the auction management or listing items category, there would be an option to create a new auction item.
- Fill in the item’s details, such as the title and description, starting bid price, reserve price, and the auction duration.
- Add nice pictures and indicate other auction item features, options, or categories.
- Edit any auction settings you need to customize; these may include bid increments and payment options.
- Save or publish the auction item after entering all information and reviewing it for accuracy. Ensure you preview the listing for the potential listing and accuracy before it goes live to participants.
Step – 5 Why Use an Auction Widget for Your Website?
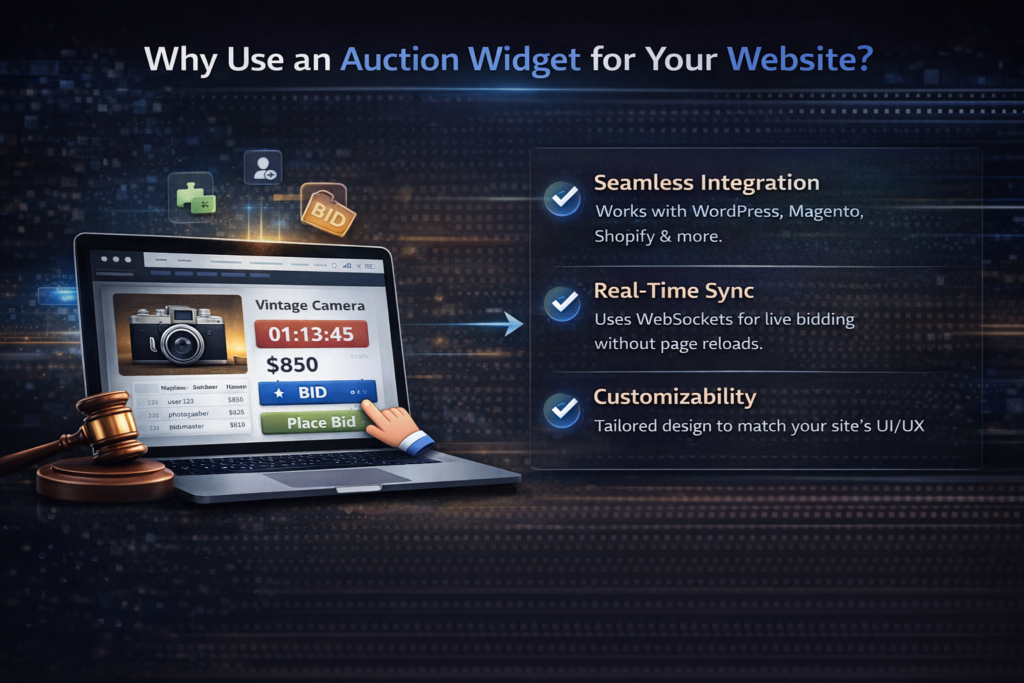
For business owners who want a plug-and-play solution without rebuilding their entire site, an auction widget for your website is the most efficient choice. A widget is a self-contained piece of code that allows you to display live bidding feeds, countdown timers, and “Place Bid” buttons on any page—be it a landing page, a sidebar, or a blog post.
There are a number of benefits to using a widget-based approach:
Seamless Integration: It works with popular CMS platforms including WordPress, Magento, and Shopify.
Real-Time Sync: Widgets usually use WebSockets to change prices right away, so the user doesn’t have to reload the page.
Customizability: At Cyblance, we develop unique auction widgets that fit your brand’s UI/UX precisely, so the bidding experience seems like it belongs on your site.
Step – 6 How to Add Auction Features to Your Existing Pages
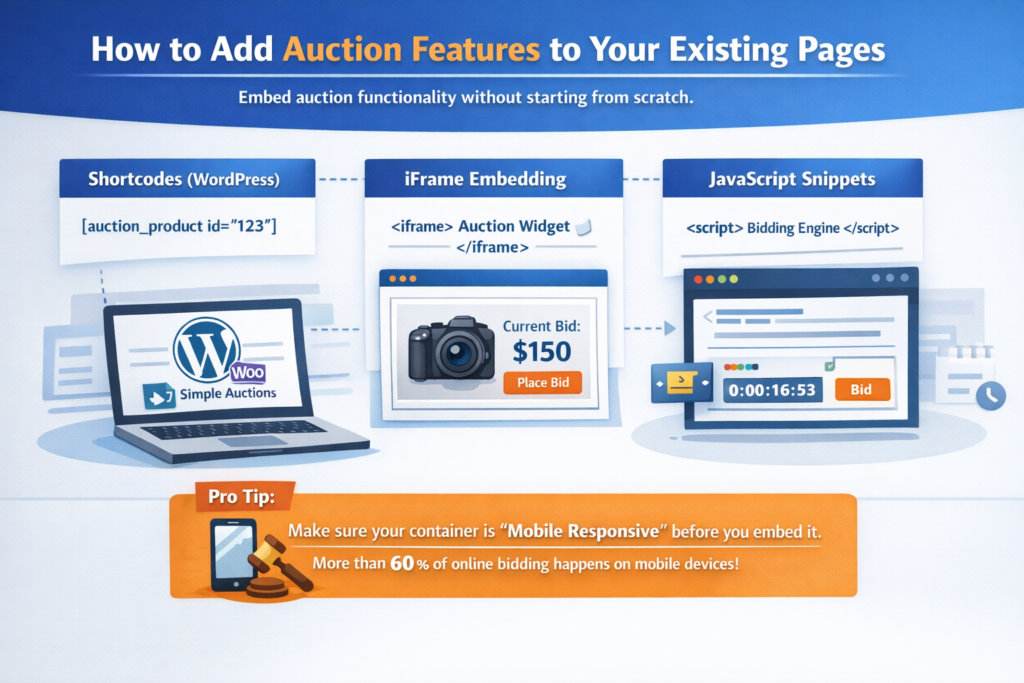
If you want to embed auction functionality without starting from scratch, there are usually three ways to do it:
Shortcodes (WordPress): If you have a plugin like WooCommerce Simple Auctions, you can use a shortcode like [auction_product id=”123″] to put a specific auction item anywhere.
iFrame embedding: Some auction sites give you an iFrame code. All you have to do is copy the snippet and paste it into the HTML editor for your page.
JavaScript Snippets: You can include a JS snippet for a more professional, SEO-friendly integration. This brings the bidding engine right inside the Div container on your site, which makes the user experience faster and more responsive.
Pro Tip: Make sure your container is “Mobile Responsive” before you embed it. More than 60% of online bidding currently happens on mobile devices.
Step – 7 Test the Bidding process
For Auction Plugins/Apps
For Shopify Store
Test the auction bidding process on your Shopify store.
- First, create a test auction with an appropriate auction app from the Shopify App Store, such as “Auctionify” or “Product Auction.”
- Set up all your auction details, such as auction start and end time settings, bid increments, reserve price, etc.
- Make a test auction listing with sample items, and all settings should be correctly applied. Simulate the bidding process using different user accounts to place test bids and ensure all bid increments, notifications, and payment processes work in order.
- Observe at both the admin and the user sides that the auction process is running smoothly: bids are placed and updated, and auctions are closed without glitches.
- Test, then review the results for any issues or adjustments before going live with real auctions.
For WordPress Website
To test the auction bidding process on a WordPress website,
- First, ensure your auction plugin is fully configured, and an auction item has been created.
- Log in to your website as a test user or create a new test account to simulate the bidding process. Navigate to the auction item page and place a bid by entering an amount higher than the current bid.
- Confirm that the bid is accepted and the history is updated correctly.
- Ensure notifications are sent to the auction owner and other participants as specified.
- Test the functionality of bid increments, reserve prices, and automatic bidding features, if available.
- Finally, review the auction’s end time and ensure that the highest bid is correctly identified and recorded as winning. This thorough testing helps to ensure a smooth user experience and accurate auction outcomes.
For Custom Auction Functionality Development
- Set up a test environment that precisely reflects the production setup to test the bid process inside a custom-designed auction system.
- Make sure all the nuances are accurately produced: bid features like reserve prices, time limits, and all other special auction features.
- Create several test auction items with different variations and combinations of parameters for testing on them in different scenarios.
- Log in to the system under the testing user, bid on those items, and check that these correspondences are recorded at the system level with the correct bid increment and under-bidder reserve price.
- Try the automatic bidding, set a maximum bidding amount, and check if the system correctly places the correct equivalent for you.
- Verify that the auction countdown is being updated in real-time when placing bids, including the fact that bids placed in the final moments properly extend the time of the auction if such a setting is present.
- Also, test user notifications for confirmation of the bids and the state change of the auction. Finally, test the end of the auction to confirm that it states the highest bidder correctly and that all the post-auction activities, like payment processing and item distribution, go according to protocol.
For White Label Auction Software Provider
Testing a white label auction software provider’s bidding process
- Log in to the provider’s platform with a test user account. Ensure the auction item has been set up correctly and is live.
- Go to the page with the item to be auctioned and place a bid as the test user, abiding by any rules associated with the bidding process, such as minimum increments.
- Verify that the bid is recorded correctly and that the history updates in real time.
- Also, ensure that it will trigger notifications to the auction owner or other bidders with an appropriate configuration within the software.
- Further, if supported, test features such as automatic bidding and confirm the auction timer for accuracy.
- Finally, at the end of the auction process, test whether the highest bid has been acknowledged and follow-up actions, such as processing a payment, are executed smoothly.
- This will ensure that the software meets expectations and that all user experiences are smooth.
Comparison
| White Label Auction Software | Plugins/Apps | Custom Auction Functionality Development | |
| Functionality | Limitation in customisation for adding auction building. | According to the Shopify plugins and WordPress Plugins. | Personalised Auction bidding functionality. |
| Timeline | Few months | 1 day to 1 week | Depends on Functionality |
| Cost | Medium | Low | Depends on Functionality |
| Hiring an expert | Not Require | You don’t need a web developer if you’re tech-savvy.If you are not tech-savvy, then you need to hire an expert | Need a Expert Auction website developement Team |
| Maintenance | The third-party software provider will provide the package. | You need a web developer for the maintenance. | You need a team to maintain the functionality. |
Picking the Best Auction Bidding Options for Your Users
You need to offer flexible auction bidding options to get the most people to participate and make the most money. Different types of products need different types of auctions. Here are the best ways to integrate:
Proxy Bidding (Automatic Bidding): This is the most common choice online. Users specify a maximum price, and the system automatically bids for them in increments to keep them in the lead.
English Auctions in Real Time: The usual “ascending price” concept, where the highest bidder wins.
Sealed or blind Auction: Sealed or blind bids are when bidders make their “best and final” offer without knowing what other bidders have offered. This is great for high-value government or real estate contracts.
Dutch Auctions: In Dutch auctions, the price begins high and goes down at certain times until someone agrees to pay the current price.
Buy It Now (Fixed Price): This option lets bidders who don’t want to wait skip the auction and acquire the item right away for a higher price.
You may appeal to both “bargain hunters” and “serious investors” by giving them a choice of bidding methods.
Conclusion
Now you know how to add the auction bidding functionality to your current website, you can take help from Expert Auction website development company. This is where Cyblance and its expert team will play a role in helping you, providing advice, and developing your custom auction bidding functionality and add to your current website.

FAQs
An auction widget is a plug-and-play part that lets people bid on any web page. It shows current bids, user history, and the bidding button in real time, so you can turn a static page into a live auction house right away.
Most of the time, to embed an auction, you go to your auction management dashboard, click “Get Embed Code,” and copy the iFrame or JavaScript snippet that is given to you. Then, you put this code into the editor of your website, such a Custom HTML block in WordPress or a Code element in Shopify.
Proxy Bidding (automatic), Reserve Price (the lowest price you’ll take), and Buy It Now (fixed-price purchase) are the best ways to bid at an auction. Offering numerous types of auctions, such as English, Dutch, or Reverse, helps you meet the needs of diverse buyers.
Yes. You can use special plugins like WooCommerce Simple Auctions with WordPress. There are a number of apps in the Shopify App Store that let you add widgets to your product pages so you can manage auctions right from there.